
This weekend we are going to start crafting our Valentines for our Valentine's Day Craft Party. We wanted to share with you some of our favorite Valentine Crafts that we found ALL over the internet that we want to share with you.... (be sure to check back as we will continue to share more ideas with you if we find them)
Conversation Hearts
 | |||
| by Lavender Limes Heart Break Valentines  If staples aren't your thing, tape around the edges to seal the heart shut or glue the edges together (let the glue dry completely before filling with candy). If staples aren't your thing, tape around the edges to seal the heart shut or glue the edges together (let the glue dry completely before filling with candy).You can find the Template along with detailed instructions HERE Easiest Heart Garland |


 Fill each mold with crayon pieces and bake until the crayons melt, about 10 to 15 minutes. Tip: Place a sheet pan under the crayons to catch any drips.
 Once they're cool, remove the hearts from the molds and smooth any rough edges by rubbing them on a piece of scrap paper.
Salt Dough Sweet Hearts
Photo from Kiddio
Best Homemade Playdough
1 c flour
1/4 c salt
2 tsp cream of tartar
2 Tbsp oil
1 c water
food coloring
1 tsp vanilla or peppermint extract (optional)
Stir ingredients together in a medium-sized saucepan. Cook over medium heat, stirring constantly for 2-3 minutes until the dough comes together. Dump it out on the counter and knead for a minute until shiny, smooth, and resilient. Let it cool until you can handle it and then roll it out to cut with heart-shaped cookie cutters. You can use tiny stamps to stamp messages on them.
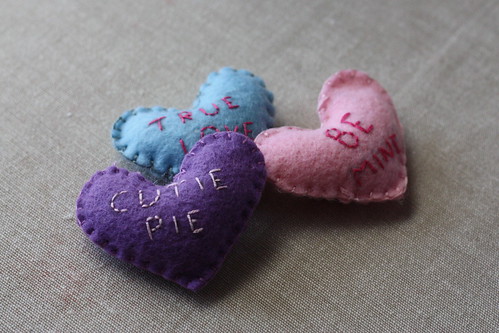
Heart Pencil Topper
Cut 2 small 2 inch felt hearts, sew them together, but stop at the bottom to let the pencil through. Then slip the pencil into the slot and you have a fun Valentines pencil topper for your child and their class.
Peppermint Hearts
provided by Flossie Teacakes
Ingredients:
1 Egg White
Icing Sugar (unlimited amounts!)
Lemon Juice
Natural Peppermint Essence
Pink or Green Food Coloring
Water
1.In a bowl mix an unspecified amount of icing sugar (a medium-sized mound) with the egg white and a generous capful of peppermint essence and the food coloring. At this point taste to see if you like it to your liking - we like ours strong!
2. Once these are mixed, put your spoon to one side and let the eager little hands begin the work of bringing the ingredients together to form a large ball. If there isn't enough liquid in the mix at this point add lemon juice (make sure it hasn't got 'bits' in and substitute with water if it's getting too lemony!) until the consistency is just right (you want the ball to be stuck together smoothly and quite dry).
3. Sprinkle icing sugar over your work surface to stop it sticking, put your ball on the worksurface and then sprinkle a little icing sugar over that too, and then let the rolling begin. We make our creams about 1cm thick.
 4. Use your choice of cutter to make shapes. You may need to keep re-balling and then re-rolling to get the most out of your mixture. Take plenty of time over this section - if there are children involved it should fulfil all your children's play-doh needs until the next baking session (allowing those nasty tubs of carpet-ruiners to stay at the back of the cupboard).
 5. As the creams are made you can put them onto baking parchment (to stop them sticking) until they're properly hardened.
 Once they are properly hardened start arranging prettily on a plate, using the 'one for me, one for the plate' method of distribution.
Simple Paper Flower

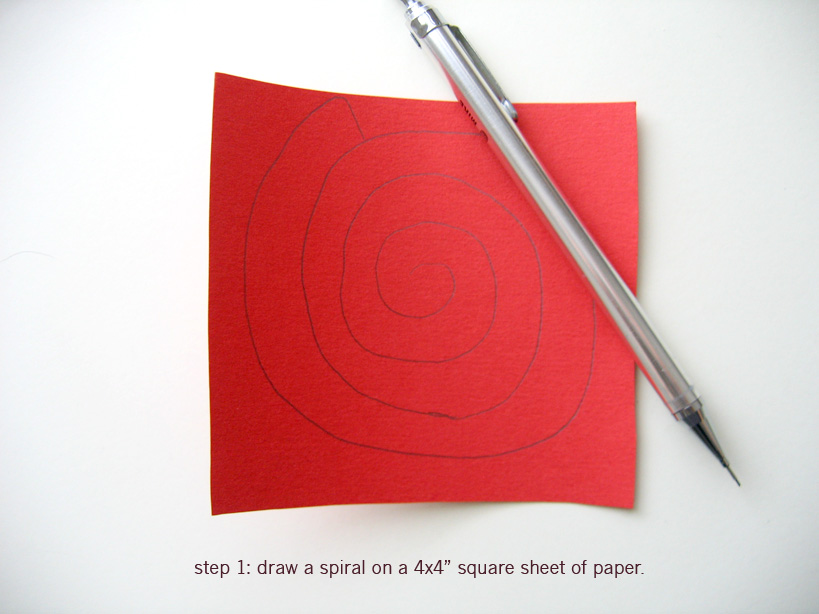
Paper Flower tutorial brought to you by Dozi
The credit for these go to Martha Stewart.Step 1: Draw a spiral on a 4x4" square sheet of paper
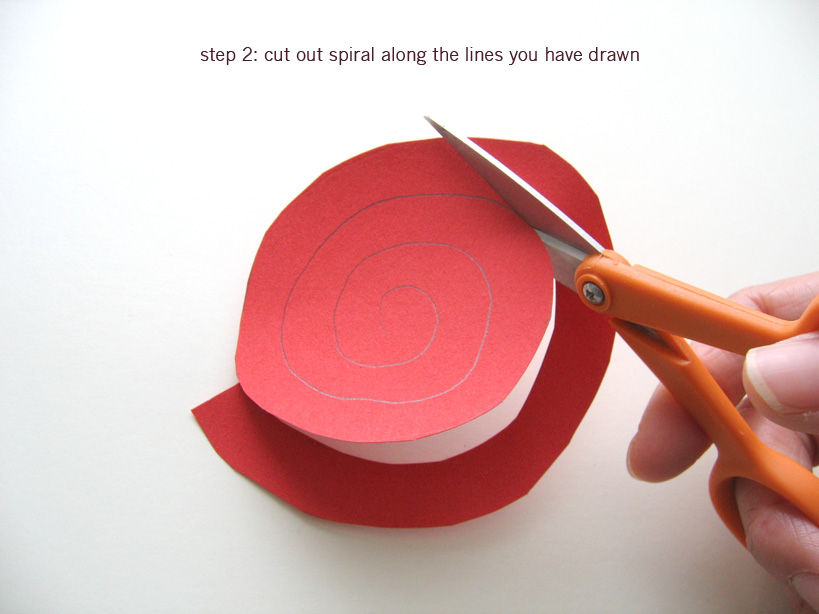
Step 2: Cut out spiral along lines you have drawn
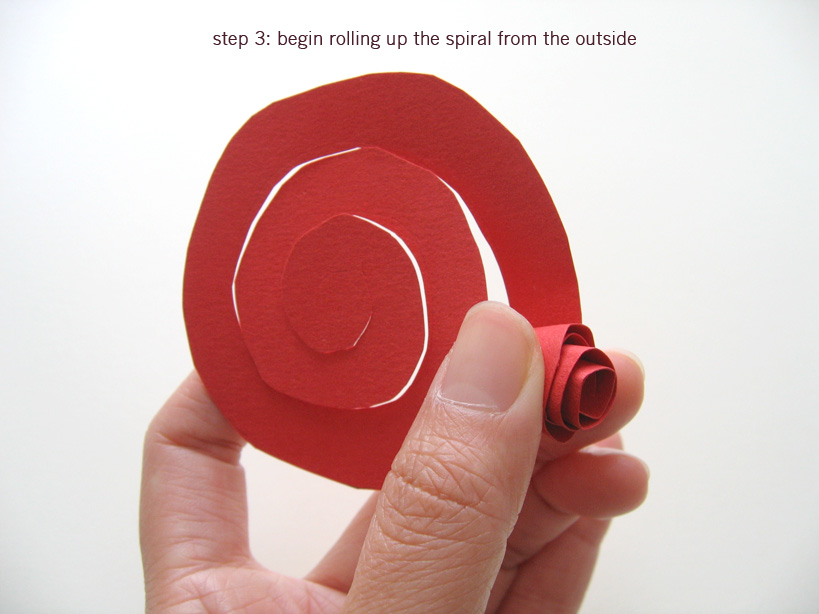
Step 3: Begin rolling up the spiral from the outside
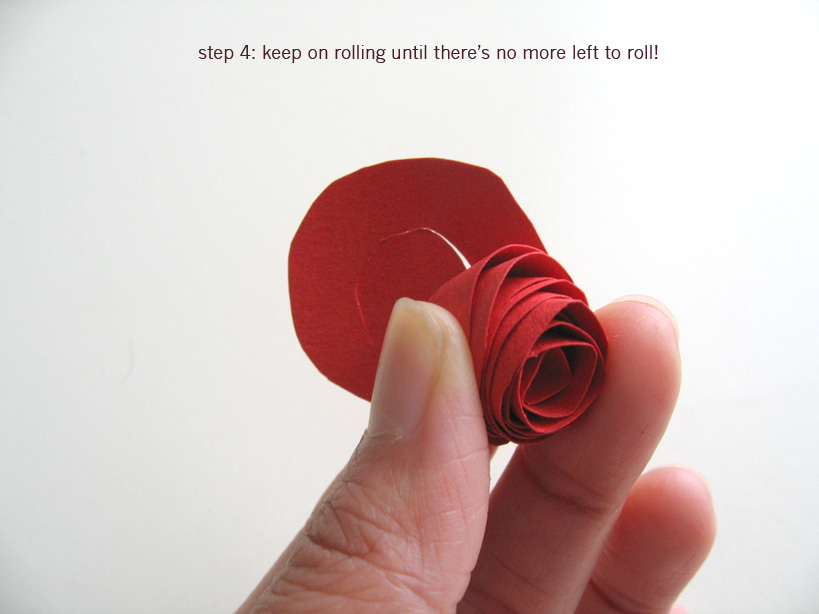
Step 4: Keep on rolling until there's no more left to roll
Step 5: You're done!

Some other ideas....
 |
| Polymer Clay Heart Buttons |
 |
| Felt Hearts |
Ice Hearts by Craftberry
Using Food Coloring or Paint and tinfoil you can make these adorable ice hearts!


Felt Heart Magnets by Craftapalooza

- Trace hearts (use a cookie cutter as a template) onto your felt, you'll need 2 felt shapes per magnet.
- Get one one of your magnets and glue one to one of your felt pairs. This helps keep the magnet in place. (we use E6000 glue which is available in craft stores)
- Once the glue has dried grab the other piece of felt and start a blanket stitch around the edge.
- Leave a small gap and put your stuffing into your felt shape, then finish your blanket stitch edge.
No comments:
Post a Comment