Loading

Friday, April 15, 2011

Leonardo da Vinci Birthday & Rubber Eraser Day!

Today is the birthday of Leonardo da Vinci and Rubber Eraser Day!
 
Leonardo Da Vinci's Birthday-
Today is the birthday of Leonardo daVinci.  Leonardo was and is renowned[2] primarily as a painter. Among his works, the Mona Lisa is most famous and most parodied portrait and The Last Supper the most reproduced religious painting of all time.  It just so happened that Matthew just learned about him in his Art History class.  He was amazed on how many things Leonardo daVinci has created in his lifetime.  This inspired him to keep his creative side active and one day possibly do something just as grand!   
The Last Supper

Rubber Eraser Day-

On this day in 1770, Joseph Priestly discovered the eraser, using pieces of rubber imported from Brazil. Then in 1858, by a stroke of genius, Hyman Lipman of Philadelphia patented the pencil with an eraser at the end.
      The rubber eraser allows us to rub out the goof-ups, erase the splotches, and generally start fresh once again.


How to Make a Pencil Eraser
Difficulty: Moderately Easy

Things you'll need:
· Pliatex Mold Rubber (Buy Pliatex Mold Rubber at an art supply or crafts store)
· Vinegar Salt Sand Flour
· Talcum powder

Instructions:
1 - Mix Pliatex with water, evenly, depending on how large you want the eraser to be (for example, use 10 mL of water and 10 mL of Pliatex). In a different container, put half as much vinegar as you have combined between Pliatex and water.

2 - Pour the Pliatex/water combination into the vinegar and stir the entire concoction at the same time.

3 - Shape the eraser/rubber to your liking. It should be malleable enough to make into shapes.

4 - Remove the rubber after a moment and place it into a container with water. You will need to remove any bubbles during this step.

5 - Remove the rubber from the water and let it dry. Once it dries you will have your new eraser!


Thursday, April 14, 2011

Earth Day Volunteering with kids!

April is Volunteer month, during this month we also celebrate Earth Day and Arbor Day.  We visited the Earth Day website - http://act.earthday.org/ and found local events that we can participate in.   All you need to do is enter your zipcode and they will provide you with the rest!  We found a town near us that is planting 1,500 trees so we have decided to volunteer for this event. 


Tuesday, April 12, 2011

Civil War 150th Anniversary!


Today is the Anniversary of the beginning of the American Civil War.  On this day, 150 years ago; the confederates bombarded Fort Sumter beginning the hostilities.  These were the first shots of the Civil War.

Visit here for 19 illustrated pictures of Fort Sumter -  http://www.civilwar.org/photos/galleries/fort-sumter/battle-of-fort-sumter.html


If you have 3-D glasses at home they even have a 3-D Photo Presentation here - http://www.civilwar.org/photos/3d-photography-special/fort-sumter-in-3d.html

For lots of educational facts and a calendar of events check out the Civil War website - http://www.civilwar.org

Sunday, April 10, 2011

Draw a Picture of a Bird Day

Yesterday we celebrated draw a picture of a bird day

this is such a neat thing to do with kids.  This year, Lauren colored some birds that we printed out for her.  She then placed them on our ongoing paper tree we have for the month of April in our dining room.  Matthew drew some birds of his own to place on the tree.

This is a great day to either familiarize yourself with your local birds or find out how many species and kinds of birds there are. 

We had a wonderful time coloring and creating our birds to add to our tree. This is such a fun project and we are just having a blast with it.


Wednesday, April 06, 2011

Recycling Crafts: Rolled Paper Beads

To help celebrate Earth Day we have started to create Paper Bead Necklaces that we will wear during our Earth / Arbor Craft Day this year.   These are so easy and wanted to share the How-to with you!


Recycling Crafts: Rolled Paper Beads and Necklaces!

Beads from Paper+necklace
pictures from creativejewishmom.com


Supplies:
  • glossy printed pages, grouped according to color theme  (multicolored, earth tones, black and white print)
  • white glue
  • something smooth to roll the bead around — the handle of a paintbrush (these are nice because the taper of the handle makes the beads easier to slide off) dowels, pencils or pens, broomsticks?
  • scissors
  • varnish — spray or water based brush-on acrylic (optional)
  • glass or wooden beads (optional)
Step By Step How-To:
Paper Beads;step one-two
Step 1: Cut an elongated triangle out of catalog or magazine paper. (the base of the triangle will determine the length of the bead, the longer the triangle, the chubbier the bead) Rough proportions for this triangle are 2" base and 7" length. Experiment with different sizes to obtain a result you are happy with.

Step 2:
Smear a bit of the glue on the inside of the triangle as shown.  If you apply glue along the entire length it will be hard to slide the bead off the stick after rolling.
Paper Beads;step three-four copy
Step 3: Starting at the wide end, roll the triangle around your stick of choice.

Step 4:
For best results roll carefully such that when the bead is entirely rolled, the end point of the triangle will lie at the center point. (see picture)
Paper Beads; step five copy

Step 5:
Carefully slide bead off the stick. If you rolled your bead too tight at the rolling step, you will discover it at this time, as your bead will be stuck! (If this is the case roll more loosely with the others...)

Step 6: Set beads aside to dry on a glue-free surface, such as a clean plate, and be careful to keep them separated or they may stick together as they dry. When dry, beads can be sprayed with a coat of gloss varnish for extra protection and shine. Water based acrylic varnish can be brushed on— a less hazardous and healthier option but more work!
Paper Beads Step7 copy

Step 7:
When the glue is dry, beads can be strung on a variety of materials— dental floss, yarn, kite string, fishing line or wire. You might want to string heavier glass or wooden beads in between the paper beads to give the necklace a more satisfying weight, and allowing the necklace to lie nicely on the proud wearer!

Step 8: Enjoy! And remember beads are not just for girls! They can be used for a wide variety of projects other than necklaces.

Friday, April 01, 2011

April Fool's Day

April Fool’s Day!
Today is April Fool’s Day which although it is not a national holiday is celebrated all around the world.  It is a day of good natured pranks and funny jokes.  Last year we used this day to teach the children how to use jokes while talking or presenting their presentations.  We then created some really fun joker hats with craft foam.

Here at fun and facts with kids we are planning a brilliant April with lots of fun activities and creative fun.  We also have a little fun celebrating this day, April Fools.  This year we have several holidays’ that fall so close together on the calendar.  We have decided to combine both Earth Day and Arbor Day. 

This year we are really using our creative juices and have come up with the idea!  We want to only use items that we have already that are normally recycled.  We started off by creating a giant tree.  We cut open 6 recycled brown paper grocery bags and then taped them together.  We then hand drawled a free flowing tree.  We had a small roll of light blue wrapping paper that we used to cover part of the wall to represent our blue sky.  Then with a little help we taped our tree to the blue paper. 

In preparation for our decorating plans for these two fun days, there is a day called “Draw a picture of a Bird Day” that falls on April 8th.  Last year we decoupaged rocks with pictures of birds that we loved.  The kids also colored in owls on a piece of paper with glue and then sprinkled glitter on them. When they were done they made foam frames out of craft foam sheets and we had sparkly pictures to enjoy all year.  We have asked the kids to see if they can come up with idea for making birds for the tree using recyclable materials.  Lauren still loves to color and we have printed out some pictures of birds for her to color, cut and add to the tree. 

Throughout the month of April we are going to be adding all kinds of fun things to the tree. This has really gotten the children’s creativity going.  We plan to make birds, leaves and all kinds of fun things for the tree using recycled items. 

Earth Day is a very educational day here at fun and facts with kids.  After our lunch the kids present us with their own creative Earth Day presentations.  Last year they did a wonderful job and we can’t wait to see what they come up with this year.  

Matthew came up with a crafty idea last year and surprised both of us with Earth Day bracelets.  He painted earths on 2” buttons and then strung them together to form a bracelet.  We love them!!  This year he has a new idea.  He created Earth Salt Dough.  Basically he made ordinary salt dough and decided to add cinnamon to make it brown and parsley flakes because he thought it would be “earthy”, so cute!  He then rolled the salt dough and made beads by placing them on a skewer.  Lauren liked this idea and started to do the same.  In the theme of making beads we decided to teach the kids how to make paper beads.  We will share this craft with you in another post. 

We will be planting some trees this month in our community.  We visited the website for our local Horticultural Society and found some local areas where they will be planting trees during the month and we will go and volunteer our time and efforts and help them plant the trees.  We hope this will be a fun and educational time for the kids. 

Easter is the next big holiday we will celebrate this month.  We have decided to dye our eggs using the Silk Tie Method.  We have never attempted this before but are looking forward to the unique colors and patterns they leave on the eggs. 

Also during this month, there are a few others worth mentioning to you that we will celebrate as well.

     National Peanut Butter and Jelly Day – April 2nd
     Zucchini Bread Day – April 23rd
     Pretzel Making Day – April 26th - The kids loved this last year and very excited to celebrate this day again!

So, follow along with us this month as we celebrate this educational and exciting month.  With spring here and the weather getting warmer we are expecting a fun and enjoyable month.

Thursday, March 31, 2011

Herr's Potato Factory Tour with kids!

Last week to help celebrate National Potato Chip Day we took the kids to the Herr's Potato Factory. The kids were able to learn how potato chips were made and packaged before being shipped out to the stores. We were surprised that they were also making pretzels and corn chips this day as well. During the tour, our tour guide disappeared for a few minutes and returned with a tray of freshly made potato chips for us to try. The really exciting part of this was that the chips were still warm! None of us have ever tasted anything like it. The kids got to see how the chips were seasoned, divided for packaging and even labeled. Most of the work is done by computers but there are workers standing by monitoring the process.

 The kids got to learn that each truck load of potatoes is placed on a hydrologic lift and then the potatoes are rolled off the back of the truck into the basement section of the assembly plant. We also were informed that a computer can hand pick and immediately toss out any potato slices that have green or brown on them. Our tour guide told us that the green on potatoes meant they received too much sun while growing in the ground and the brown colored means they had too much sugar and got caramelized during their cooking process. Someone on the tour asked “what happens to the chips that fall on the floor during the process?” and our tour guide told us that the Herr’s family actually has Angus Cows on the farm and they feed them to the cows. I guess even the cows in Nottingham get to have their afternoon snack too. 

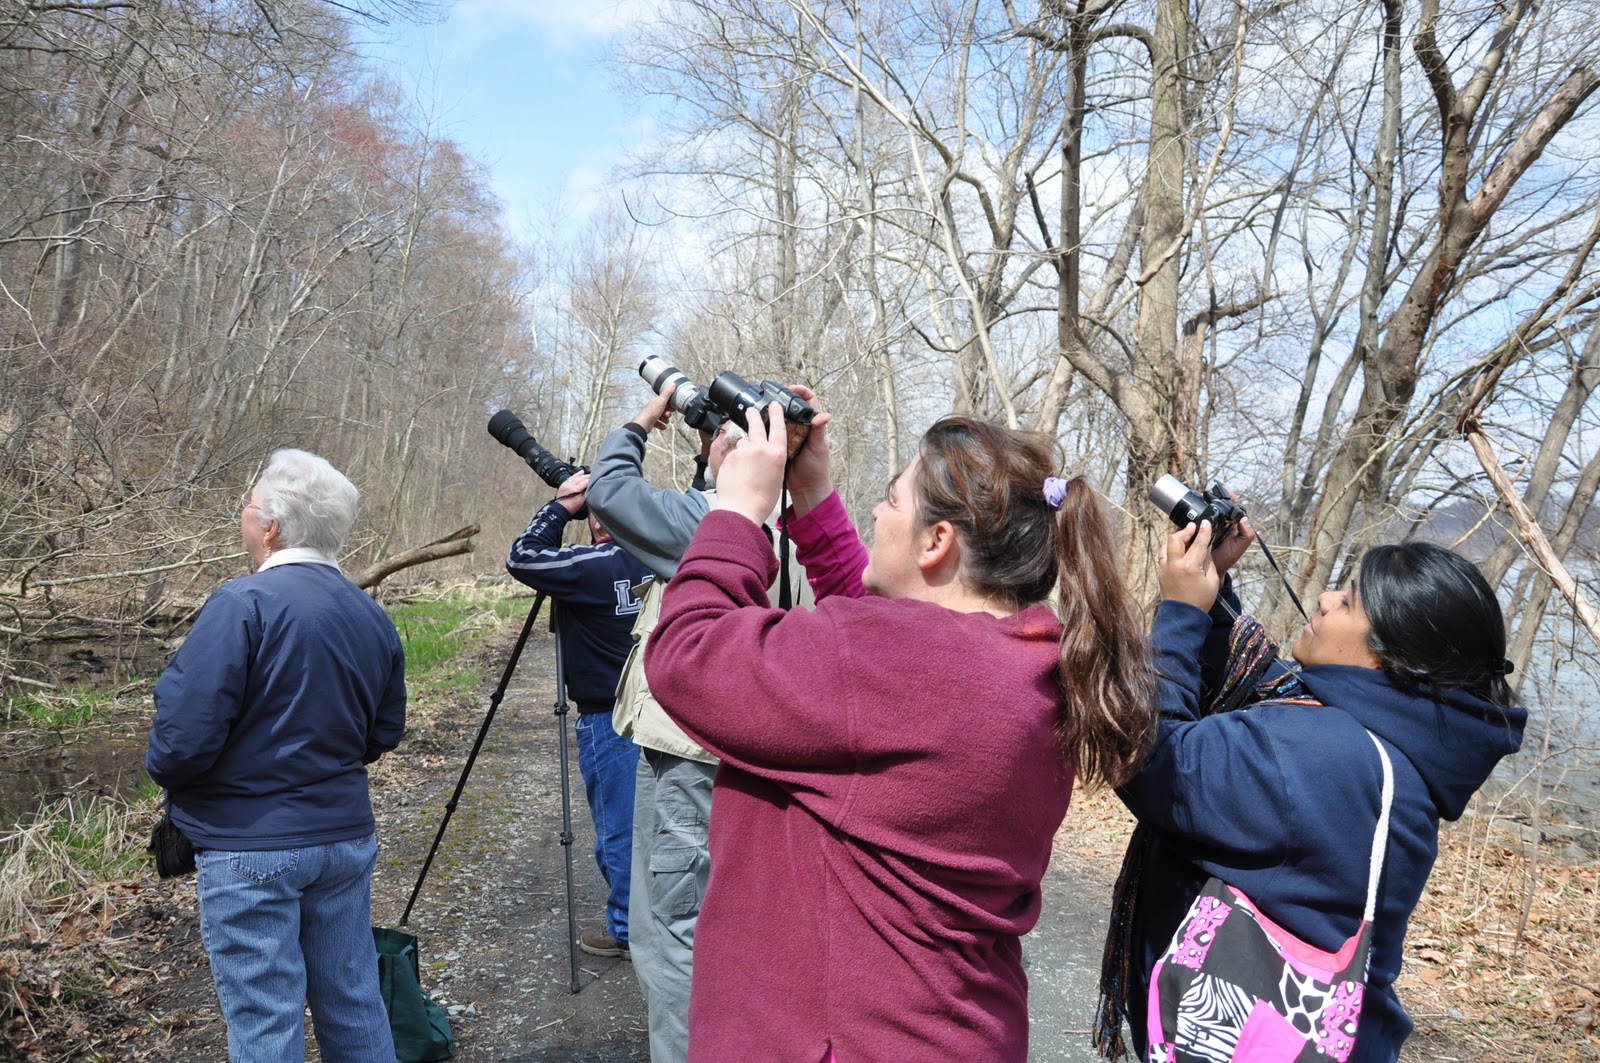
After the tour was over we had a simple but yummy lunch in their lunch room. We then got back in our cars and drove a little more south to the Conowingo Hydroelectric Plant and Dam. Unfortunately, the plant is now closed for public tours. We were able to take a nature walk along the river. We posed for pictures with the Dam and the very fast moving water in the background. We also witnessed a spectacular surprise – a Bald Eagle soaring above us! We watched as the parents took turns leaving and protecting the nest.

We all had a great time and thoroughly enjoyed our day!

Kids favorites for today ……..
Lauren "I LOVED the potato chips"
Matthew "Eating the fresh new potato chips was totally AWESOME"

Our hike:
During our hike around the dam we were on the watch for what was around. We studied the ecosystems within the biomes. They were full of many interesting things. First there was a great deal of wonderful mushroom specimens and other fungus. We admired the bright green moss covered on some trees and rocks. The kids especially liked finding tadpole eggs in a very large water puddle along the path.

Lying all over the ground we found coarse woody material or fallen dead wood pieces. If you have grade school children you’re probably already aware that they serve as carbon holders which is vital to our ecosystems and forests. These provide places for seeds to grow as well as natural mulch for the earth. Add that with all the fungi which would keep moisture and you have a happy little ecosystem.

What is a Biome?
A biome is a large area with similar flora, fauna, and microorganisms. Most of us are familiar with the tropical rainforests, tundra in the arctic regions, and the evergreen trees in the coniferous forests. Each of these large communities contain species that are adapted to its varying conditions of water, heat, and soil. For instance, polar bears thrive in the arctic while cactus plants have a thick skin to help preserve water in the hot desert. To learn more about each of the major biomes, click on the appropriate heading to the right.

What is an Ecosystem?
Most of us are confused when it comes to the words ecosystem and biome. What's the difference? There is a slight difference between the two words. An ecosystem is much smaller than a biome. Conversely, a biome can be thought of many similar ecosystems throughout the world grouped together. An ecosystem can be as large as the Sahara Desert, or as small as a puddle or vernal pool.
Ecosystems are dynamic interactions between plants, animals, and microorganisms and their environment working together as a functional unit. Ecosystems will fail if they do not remain in balance. No community can carry more organisms than its food, water, and shelter can accommodate. Food and territory are often balanced by natural phenomena such as fire, disease, and the number of predators. Each organism has its own niche, or role, to play.
 

Wednesday, March 30, 2011

Pencil Day

Hymen Lipman Pencil Patent
Innovation in the pencil industry

Today we celebrate the first patent on the modern pencil. There have been many innovations in pencil design or methods of production through the last several hundred years. March 30th, 2008 marked the 150th anniversary of a famous patent which was the first patent to address the installation of a rubber eraser at the end of a wood-cased pencil. The patent filed by Hymen Lipman of Philadelphia, PA was granted on March 30th 1858. An interesting feature of this design was that the eraser was actually installed within the wood of the pencil opposite from the writing core end. In this manner, the pencil could be sharpened on both ends to refresh either the graphite core or eraser.


As it turns out, there were countering claims from another inventor who developed the use of a ferrule to attach an eraser. Faber claimed these were not patentable innovations since pencil and erasers previously existed. The combination did not change the basic function of these two items. The case eventually went to the U.S. Supreme Court.

Pencils have been mass produced in Europe since 1622, but they weren't in production in the United States until 1812. Pencils began being painted yellow because it is a color often associated with royalty and honor. During this time, a yellow pencil became known as the best type of pencil you could buy.

Why are Pencils Yellow?
The true story behind the yellow pencil

Pencils have been painted yellow ever since the 1890s. During the 1800s, the best graphite in the world came from China. American pencil makers wanted a special way to tell people that their pencils contained Chinese graphite.

In China, the color yellow is associated with royalty and respect. American pencil manufacturers began painting their pencils bright yellow to communicate this "regal" feeling and association with China. However, according to Henry Petroski's history of the pencil, the European producer Koh-I-Noor was the first to paint one of their pencils yellow.

The rest, as they say, is history.

FUN FACTS about PENCILS:

When was the pencil invented?
Some time prior to about 1560, graphite was discovered near Borrowdale, England, supposedly when a large tree was uprooted in a storm, exposing a black substance beneath its roots. The usefulness of graphite as a marking substance was quickly realized. Though the exact date is not known for certain, the year 1565 marks the first record of a pencil consisting of a piece of graphite inserted into a wood shaft, making the first ancestor of today's pencil.

Where was the pencil invented?
Since graphite was discovered in England, it is most likely that the first pencils were made in England, though this is not known for certain. The pencil was further developed by European craftsmen.

Who invented the first pencil?
It is not known who invented the first pencil. The pencil was first documented in 1565 by Conrad Gesner, and its invention is sometimes attributed to him, though this is unlikely. European craftsman (woodworkers) were the first known pencil manufacturers, and it wasn't until the late 1700's that manufacturing techniques similar to those practiced today were developed.

Why is the 'lead' so called?
Before the discovery of graphite, soft metals such as lead were often used for writing. One early name for graphite was 'black lead', and the name 'lead' has remained in use.

Can one get lead poisoning from pencil lead?
No. The 'lead' in lead pencils is actually graphite, which is a form of carbon and is non-poisonous.

What do the numbers and letters on pencils mean?
The numbers or letters refer to the hardness or softness of the lead. Read the article 'Grading Pencils' for more information.

What is a 'carpenter' pencil and why are they shaped so funny?
A carpenter pencil is usually a large, flattened pencil used by carpenters. Their shape helps prevent them from rolling.

How are pencils made?

The picture at left illustrates the steps involved in the manufacture of a wood pencil. 

It starts with a block of cedar (1) which is then cut into slats (2).
The slats are then stained (3) and grooves are cut into one surface (4). 

Prepared leads are placed into the grooves (5) and a second slat is placed on top and bonded with the first (6). 

This 'pencil sandwich' is then passed through a milling process (7) to separate the individual pencils (8). 

The pencil is painted and finished (9 & 10), a ferrule crimped onto the end (11), and finally, an eraser is crimped into the ferrule (12).


 Also On This Day:
 - The 1st recorded passing of Halley’s Comet (240 B.C.)
 - Florida became a U.S. territory (1822)
 - Anesthesia was used for the 1st time in an operation (1842)
 - Alaska was purchased from Russia for approximately $0.02 per acre (1867)
 - The 15th Amendment went into effect, giving Black men the right to vote (1870)
 - The Queensboro Bridge opened (1909)
 - Jeopardy premiered on NBC (1964)
 - President Ronald Reagan was shot in the chest outside of a hotel in the Capitol (1981)


Monday, March 21, 2011

Johann Sebastian Bach: Baroque Composer

Johann Sebastian Bach (March 21, 1685-July 28, 1750) was a German Baroque composer. He was one of the greatest composers of all time, but during his lifetime, he was little-known and was mostly recognized for performing on the organ. Bach composed in many established musical forms, including, for example, the cantata and fugue, and developed them into complex and sublime pieces. He composed over 1,100 works in almost every musical genre (except opera).

Bach was born and died in Germany, and spent his entire life there, working as an organist, teacher, and composer. He had over 20 children, including four who became famous musicians in their own right, including Carl Philipp Emanuel, Wilhelm Friedemann, Johann Christoph Friedrich, and Johann Christian.

Bach's Early Life:
Bach was the youngest of eight children. His father, Johann Ambrosius Bach, had been a town musician, and probably gave Bach his early music lessons. His mother, Maria Elisabetha, and his father died within a year of each other (in 1694 and 1695, respectively). Orphaned at age 10, Bach moved in with his an older brother, Johann Christoph, who was the organist at St. Michael's Church, Ohrdruf. This brother probably taught Bach much about the organ.

Bach's Early Career:
Bach's early career involved playing the violin and organ at a low-level position in the ruling court in Weimar and in Neukirche, Arnstadt, beginning in 1703.

The Re-Discovery of Bach's Works - Bach's Back:
Bach's works were soon forgotten (but then again, they were hardly known during his lifetime - many of his works were not published until a century after his death). In March, 1829 (almost 100 years after Bach's death), the composer Felix Mendelssohn performed Bach's St. Matthew Passion, spurring a world-wide interest in Bach. Soon, Bach's works were appreciated by the world - essentially for the first time. 


To learn much more about him visit the official website here - http://www.jsbach.org/
To listen to some of Bach's works visit this website that lists many websites that contain files - http://www.jsbach.org/websites.html

Here is a video of Rostropovich Bach Cello Suite No.1 Prelude -


Another video of Bach, Air on the G string, string orchestra)


Book and Music CD's:


Sunday, March 20, 2011

Spring is here!


We were very fortunate to have Spring like weather the past several days. We decided to make the most of it and take the kids to the beach for some overdue beach-combing!

The March Equinox Explained

The March equinox will occur on March 20 in 2011, marking the beginning of spring in the northern hemisphere and fall (autumn) in the southern hemisphere from an astronomical viewpoint. The March equinox will occur at 23:21 (or 11:21pm) at Coordinated Universal Time (UTC) on this date.

This illustration, which shows an example only of the March equinox, is not to scale.
Twice a year, around March 20 or 21 and September 22 or 23, the sun shines directly on the equator and the length of day and night are nearly equal in all parts of the world. These two days are known as the March(vernal or spring in the northern hemisphere) equinox and the September equinox.
To find the March equinox date in other time zones or other years, please use the Seasons Calculator.

What does equinox mean?

The word “equinox” derives from the Latin words meaning “equal night” and refers to the time when the sun crosses the equator. At such times, day and night are everywhere of nearly equal length everywhere in the world.
It is important to note that while the March equinox marks the beginning of spring in the northern hemisphere, it is the start of autumn in many parts of the southern hemisphere.

March Equinox Explained

The March equinox is the movement when the sun crosses the true celestial equator – or the line in the sky above the earth’s equator – from south to north, around March 20 (or March 21) of each year. At that time, day and night are balanced to nearly 12 hours each all over the world and the earth’s axis of rotation is perpendicular to the line connecting the centers of the earth and the sun.
In gyroscopic motion, the earth’s rotational axis migrates in a slow circle based as a consequence of the moon’s pull on a nonspherical earth. This nearly uniform motion causes the position of the equinoxes to move backwards along the ecliptic in a period of about 25,725 years.

Nearly Equal?

During the equinox, the length of night and day across the world is nearly, but not entirely, equal. This is because the day is slightly longer in places that are further away from the equator, and because the sun takes longer to rise and set in these locations. Furthermore, the sun takes longer to rise and set farther from the equator because it does not set straight down - it moves in a horizontal direction.
Moreover, there is an atmospheric refraction that causes the sun's disk to appear higher in the sky than it would if earth had no atmosphere. timeanddate.com has a more detailed explanation on this topic. timeanddate.com has more information on why day and night are not exactly of equal length during the equinoxes.
During the March equinox, the length of daylight is about 12 hours and eight to nine minutes in areas that are about 30 degrees north or south of the equator, while areas that are 60 degrees north or south of the equator observe daylight for about 12 hours and 16 minutes. Many regions around the equator have a daylight length about 12 hours and six-and-a-half minutes during the March equinox.
Moreover, one day does not last for the exact same 24 hours across the world and due to time zone differences, there could be a small difference in the daylight length between a far-eastern and far-western location on the same latitude, as the sun moves further north during 24 hours. For more information, find out the length of day in a particular city. Select a location in the drop-down menu below to find out the length of day around the time of the March equinox.

Vernal Equinox vs. Autumnal Equinox

The vernal equinox occurs in the spring while the autumnal equinox occurs during fall (autumn). These terms are derivatives of Latin. It is important to note that the northern hemisphere’s vernal equinox is in March while its autumnal equinox is in September. In contrast, the southern hemisphere’s vernal equinox is in September and its autumnal equinox is in March.
This distinction reflects the seasonal differences when comparing the two hemispheres. timeanddate.com refers to the two equinoxes simply as the March and September equinoxes to avoid false assumptions that spring is in March and fall (autumn) is in September worldwide. This is simply not the case.

Historical Fact

A Greek astronomer and mathematician named Hipparchus (ca. 190-ca.120 BCE) was attributed by various sources to have discovered the precession of the equinoxes, the slow movement among the stars of the two opposite places where the sun crosses the celestial equator. Hipparchus made observations of the equinox and solstice. However, the difference between the sidereal and tropical years (the precession equivalent) was known to Aristarchus of Samos (around 280 BCE) prior to this.
Astronomers use the spring equinoctial point to define their frame of reference, and the movement of this point implies that the measured position of a star varies with the date of measurement. Hipparchus also compiled a star catalogue, but this has been lost.

March Equinox across Cultures

In the northern hemisphere the March equinox marks the start of spring and has long been celebrated as a time of rebirth. Many cultures and religions celebrate or observe holidays and festivals around the time of the March equinox, such as the Easter holiday period.
The astronomical Persian calendar begins its New Year on the day when the March equinox occurs before apparent noon (the midpoint of the day, sundial time, not clock time) in Tehran. The start of the New Year is postponed to the next day if the equinox is after noon.


Spring FREEBIE!  Don't forget that if you live near a Rita's Water Ice store they are giving everyone a FREE Regular-sized Italian Water Ice today! - http://www.ritasice.com/

Spring Craft:

Stained Glass Tissue Paper Flowers

NinthStreetEaststainedglass
Tissue Paper flowers from Ninth Street East
Ninth Street East shows you how to make these beautiful flowers with only black construction paper and colorful tissue paper!
Gather together:
-black construction paper
-light colored pencil crayon
-scissors
-tissue paper of various colors
-glue stick
-exact o blade


Fold a piece of black construction paper together, so it is two layers thick. Draw out your flower design onto the folded paper.

Cut out the flower with scissors on the outer edges and an exact o blade for the inner design. Being careful to hold the two pieces of paper together.

Here is what it will look like once all the parts are completely cut out.

The top flower and the bottom flower, when lined up together fit perfectly.

Choose your petal color of tissue paper and begin to cut out, and glue onto the petals. 

Once all the petals have been finished, turn it over and it will look like this.

After finding the first way to be a lot of work, I decided to just take a larger piece of tissue paper and glue it completely on.  However, if you wanted to make a rainbow flower, glueing individual petals on would work great.

Turn it over and cut off the center and outer edges. Do the same thing for the center, then glue on the other black outlined flower and tape onto your windows. Because they are completely finished on both sides, you could also make a wicked cool mobile or just hang them from the ceiling or window frames.

Event Calendar